


Onesie Bow Tie Pattern Tutorial

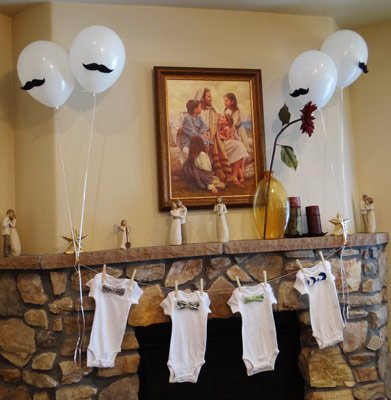
I was asked to help put together ideas recently for a friend's upcoming little man baby shower. I instantly thought of the traditional onesie clothesline used for decorations.
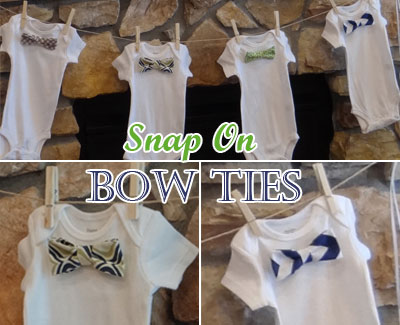
I love that the onesie clothesline doubles as both a gift and a decoration. Since the theme was "little man", I wanted to incorporate bow ties into the clothesline. I thought it would be really fun to have snap on onesies, which would allow the mom to change out the colors of the bow ties.
As the baby grows, she can attach snaps to larger onesies and continue to use the bow ties. The process of making the bow ties is also really simple, so she could always make more bow ties in the future to go with the onesies.
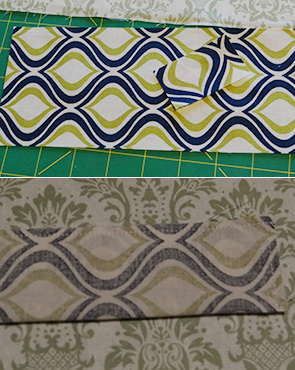
Since I was using the bow ties for a baby shower, I started by getting different types of fabric that were in the baby shower colors of blue and green. You won't need much material for each bow tie, so 1/4 a yard will give you plenty of material to work with. Before starting, cut 2 pieces of material in the sizes listed below.
Materials for Your Bow Tie:
- 1- piece of material cut to 9"x4" inches
- 1- piece of material cut to 2 1/2" x 1 1/2" inches
- glue gun
- sewing machine and thread
- iron
Bow Tie Pattern: Making Your Bow Ties
Start with your material lying in front of you, facing up. Fold your 9x4 strip of material in half lengthwise and pin along the length and one end in place. Using your sewing machine, make a straight stitch 1/4 inch from the edge on both the lengthwise edge and one of the sides. Leave one side open so you can pull the material through.
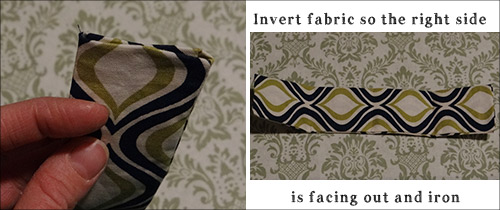
Turn the material inside out and iron material flat. I used a long wooden dowel to invert it and help push it through. Anything thin and long will work though.
Fold both ends toward the middle and slightly overlayer the ends. Hot glue them in place to each other.
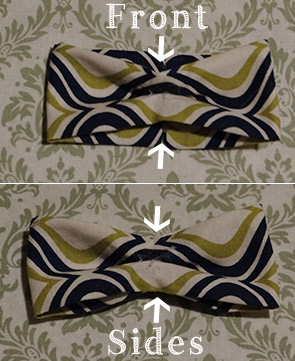
Flip over. Put a dot of hot glue in the middle of the front of the rectangle. Fold front sides in until they touch the glue (top picture). Then put some hot glue on the sides and scrunch them towards the center until set (bottom picture).
Take your smaller 1 1/2" x 2 1/2" rectangle. Iron it in thirds lengthwise so both ends meet in towards the middle (left picture). Secure inside edges with a dot of hot glue to hold everything in place. Wrap rectangle around front of bow tie and overlap ends in the back. Hot glue in place.
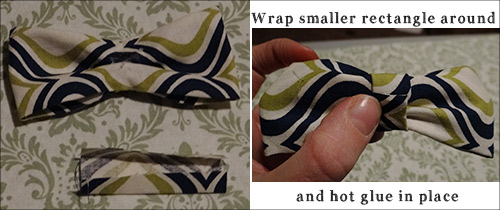
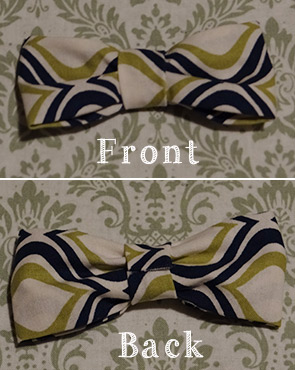
Your finished bow tie should look like this.
Bow Tie Pattern: Snap on Onesies
Now that you have fabulous bow ties, it is time to take it to the next step and add snaps to both the bow ties and onesies. This is where it got a little scary for me. I ended up going through a couple onesies before I figured it all out. But you get to learn from my mistakes, so it will be SO much easier for you.
Materials:
- onesies- good quality and thick
- bow ties- from above
- snaps- if it is your first time using them make sure there is a fastener tool in the kit
- ruler
- fabric pencil
- white felt
- 1/4 teaspoon measuring spoon
- iron on transfer paper
Note: Before we get started I will explain where my problems where, so you know what not to do. ;) I started with some white onesies in a pack that I picked up at Walmart. The only kind they had were Gerber. They ended up being a little thin for the snaps to go through. You want to use good quality thick onesies so if you have to reposition anything, the snaps will not rip holes into the onesie. Yikes! Yes, when it happened to me I almost cried.
I did a little trouble shooting and realized...
- I needed thicker onesies.
- The onesie by itself was not enough to anchor the snaps in place.
So I took a deep breath, pulled up my big girl britches and went on a hunt for better quality onesies. I found the "Precious Moments" brand of onesies at Target. They were a little thicker and worked beautifully for me. You do not need to use this specific brand, just make sure the onesies you use are thick and good quality.
I also knew I needed something extra to reinforce the snaps so that they did not rip through the onesie. I ended up buying a sheet of white felt. It really made a BIG difference in how the snaps held onto the material.
Ok now that I scared you a little bit, let me tell you it really isn't that bad once you get the hang of it. Let's get started!
Bow Tie Pattern: Measuring the onesie for the bow tie
Although it is possible to remove the snaps, it can cause damage to the material so we need to be careful to measure twice and get it right the first time if possible. :-)
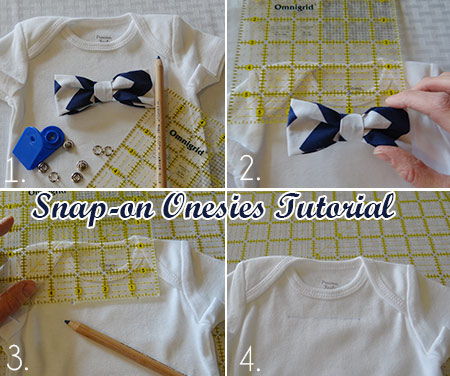

- Here are all the supplies I started with to make my onesie snaps.
- Start by laying the onesie out infront of you. Measure from one side of the scoop of the neck to the other to locate the center point. For me, the center point was at 2 inches. Position your bow tie on the onesie where you want it. For me it was about 1 inch down from the bottom of the center point of the neckline. Now that you have the center point for your bow tie. Measure your bowtie to figure out how far apart each of the snaps will be. Place the ruler at the center point of the neckline.
- From there I marked equal distance out. One mark at 6/8" and the other at 3 1/8".
- I also drew a line to try to help me keep the snaps even when I placed them.
Bow Tie Pattern: Reinforcing Your Onesie
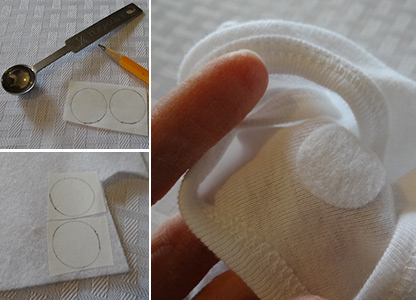
Place your 1/4 teaspoon spoon onto iron-on transfer paper. Trace 2 circles and cut out. Iron onto your white felt and cut out.
Peel the backing off the transfer paper and iron circles onto the underside of the marks you made on the onesies. This will reinforce the spots you will be placing the snaps enough to hold everything strongly together.
Snap Fastener Tip:
I used this
kind of fastener for my snaps. Place the prong side facing up on the bottom of the material.
For the top piece rub your fingers along both sides of the smooth snap. There will be one side that sticks out a little further than the other. Place that side facing down towards the bottom of the snap fastener.
Bow Tie Pattern: Adding Snaps
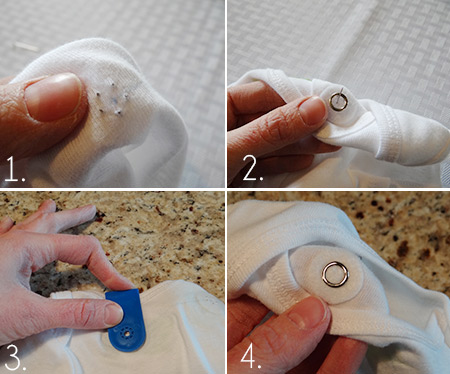

- Line up your bottom snap prong underneath the dot you made on the onesie. You want the prongs facing upwards with the dot in the middle of the circle. Push prongs through once you are are fully lined up with the dot.
- If you want a little more help getting it aligned, you can push a straight pin through the dot.
- Place top circle (you will be using the flat circles on the onesies) with the larger bump facing down over the prongs so that the prongs are lined up with the grove of the circle. Place the fastener around the snaps and pound with hammer or rubber mallet 7 times to make sure snap is secure.
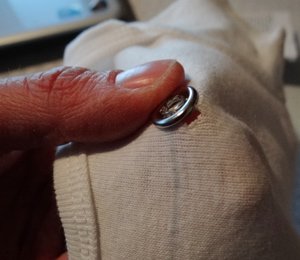
- This is what the back will look like once snap is installed. (To make sure it is secure, try to stick your nail inbetween the snaps. You should not be able to, if you are, it is still a little loose. Place the fastener back around the snaps and hit a few more times to secure.)
Attach 2nd snap, being careful to keep snaps lined up.
Bow Tie Pattern: Adding Snaps To The Bow Tie
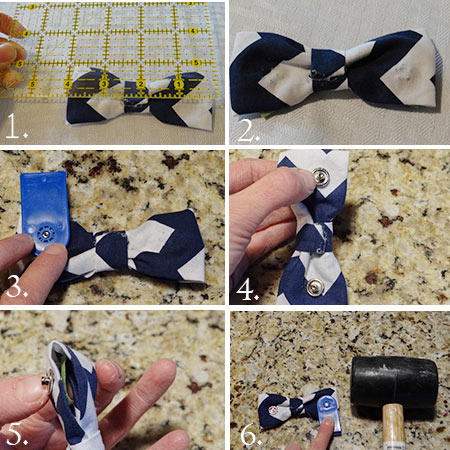

- Measure the bow tie and find the center spot. Mark out from the center spot. Since you want to match the onesies, the measurements should be the same as on your onesie. So mine were placed at 6/8 and 3 1/8.
- Slide the bottom prong of the snaps in between the layers of the bow tie. Align it with your dot and push prongs up through the material.
- Place male snap top over the prongs so that the male side is facing up. Pound 7 times or so with a hammer or rubber mallet to secure in place.
- Repeat the same process on the other side. This picture was what it looks like before I slid the fastener over the snaps.
- Here is a side view. See one of my tricks?! I use tape to hold the back prongs in place while I am securing the front of the snaps so nothing with move on me while I am working. ;)
- Here I have the snap fastener in place and I am getting ready to pound in with the rubber mallet.
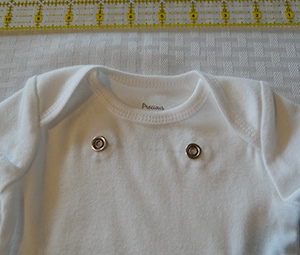
Bow Tie Pattern: Finished Onesies:
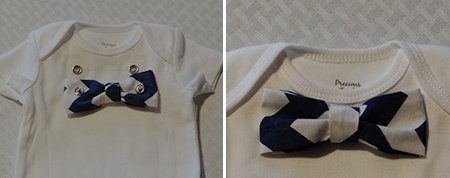
This is how the snaps look like before and after everything is snapped into place.
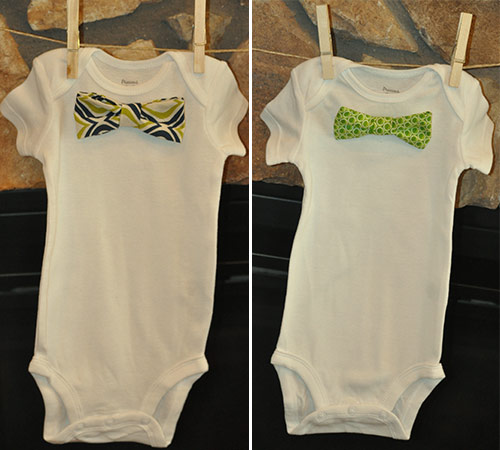
I had lots of fun blending different patterns of blue and green to go with the baby shower colors.

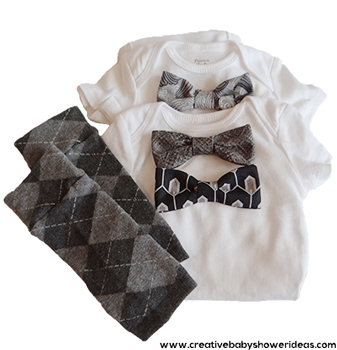
And here is a cute onesie bow tie gift I made for a dear friend of mine. I did size 3 month and 6 month onesies so he can keep wearing them as he gets older and a pair of leg warmers to match. So fun!
I hope you enjoyed our bow tie pattern tutorial! If you make this craft, be sure to send in photos of the project! We would love to see them!
Return from Onesie Bow Tie Pattern to Little Man Baby Shower


New! Comments
Have your say about what you just read! Leave me a comment in the box below.