Easy Baby Shower Banners to Make: Scrap Fabric Banners
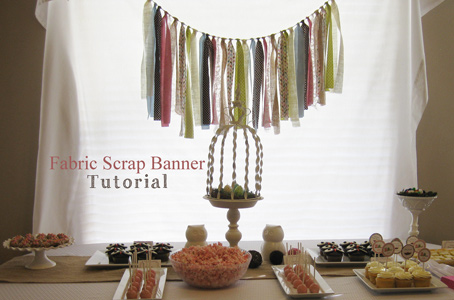
I made 2 scrap fabric banners recently for an owl baby shower that I helped put together. I love how they turned out! They added a great vintage look to the party. The best part is that they are easy to re-create for your baby shower. This is also a no sew craft (for those of you that don't want to go near a sewing machine. ;) )
Make a Scrap Fabric Banner
The first banner I made was a smaller size, to go over a welcome chalkboard. I used 5 different fabric colors, 2 burlaps and some lace to create the look. So there were a total of 8 different colors on the banner. I hung it on a hemp rope, but you can use any kind of twine or rope to tie the fabric to.
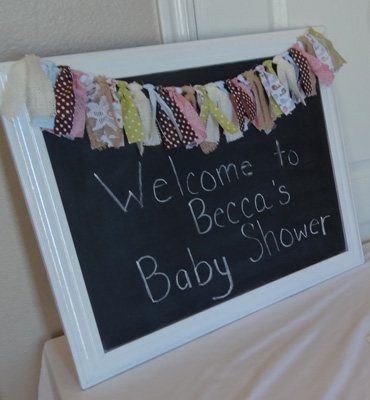
To make the smaller fabric banner...
You will need:
- Twine or hemp rope
- Coordinating fabric
- Fabric ruler
- Fabric cutter
I purchased 1/4 yard of each fabric color. It gave me plenty of fabric to work with for both banners. Depending on how many colors you are using and how long you want the strips, you might need more or less fabric to make your banner.
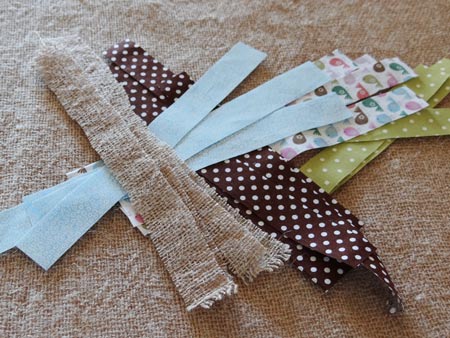
1. Square off the fabric, cutting off the scrappy looking edges. Cut your strips. For the smaller banner, I cut strips that were each 1 inch wide and 9 inches long. I ended up using 4 strips of each color for my banner.
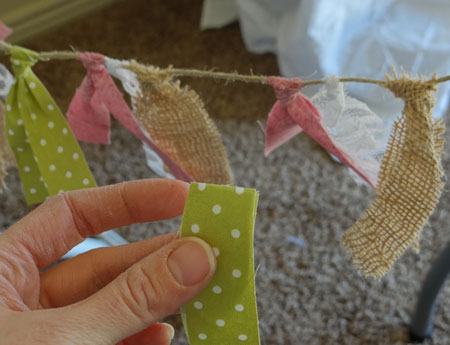
2. Tie your rope between 2 objects so you have your hands free to work. Fold each strip of material in half so that the pattern side of the fabric is facing out.
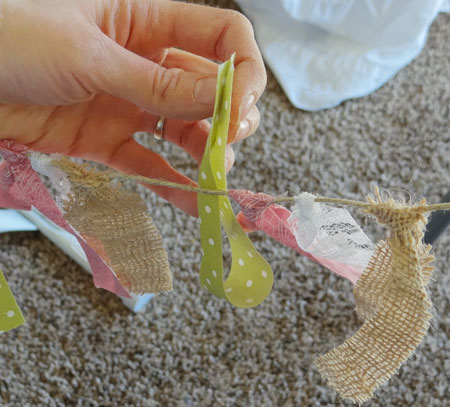
3. Hold the looped fabric underneath the rope.
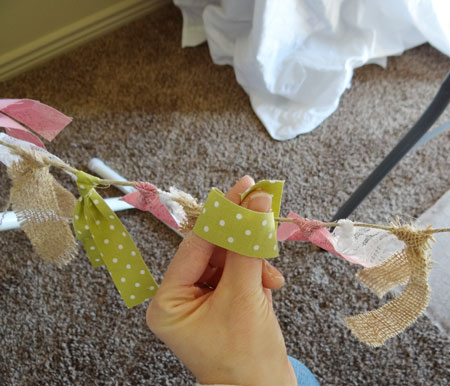
4. Pull the top end of the fabric over the rope and through the loop of the fabric. I was taking pictures with one hand here, so it might look a little confusing. I basically stuck my hand through the loop at the bottom and pulled the top end down into the loop.
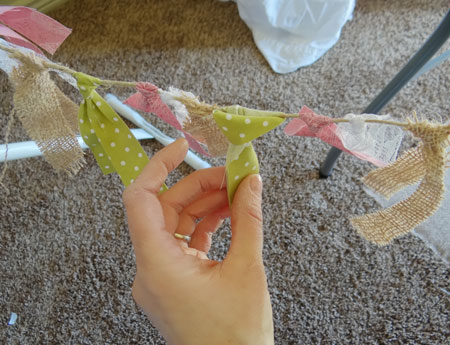
5. Continue to pull the end down until it has tightened into place.
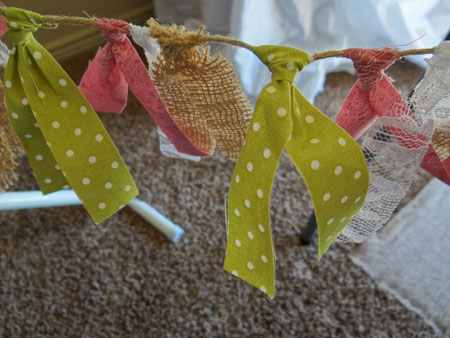
6. The finished knot on the rope. Continue with all of your fabric scraps until all of them are on the rope in the pattern you like.

Here is the photo from the baby shower table. Cute huh?!
Baby Shower Banners: Making the Large Cloth Banner
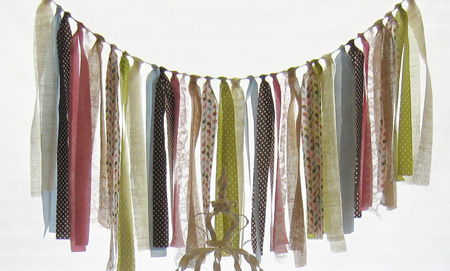
To make the larger fabric banner, I used the same material as the smaller one above. Here are the dimensions I used for each strip of fabric...
- 1 1/2 inches wide (You can go up to 2 inches if you'd like. I made the width a little smaller conserve material. ;) )
- 36 inches long (Again...the longer the strip, the longer each strand of material will hang. So if you want longer strips, cut longer strips than the dimensions I used.)
Use the same method as above to tie the strips of fabric to the banner. I used 8 different types of material on this scrap banner. I used a total of 4 strips of each color. So there are 32 total strips of material used.
Best of luck with your craft! Be sure to stop back and share your pictures with us when you are done. I would love to see them!
Return from Baby Shower Banners Idea to Decoration Ideas





New! Comments
Have your say about what you just read! Leave me a comment in the box below.