


How to Make a Cupcake Stand
An Easy Solution to Perfectly Match Your Party Theme

A cupcake tower that matches your baby shower theme can be easy to create and a beautiful way to display cupcakes at your party.
Don't you love those elegant cupcake stands that you see on the dessert tables in magazines? Cupcakes are all the rave right now. They are the perfect portion size for your guests and a little bit of heaven if you have a great recipe to use.
Until now, investing in a good cupcake stand could be a little costly. I have several stands that I use, depending on the style of party and theme. But sometimes the heights and colors do not work well with what I want to create.
When I need an inexpensive cupcake stand to match the party decor, I create my own. It is fairly quick to assemble and really easy to customize to the colors and size I need. You probably already have most of the items you need in your house to create one.
How to Make a Cupcake Stand
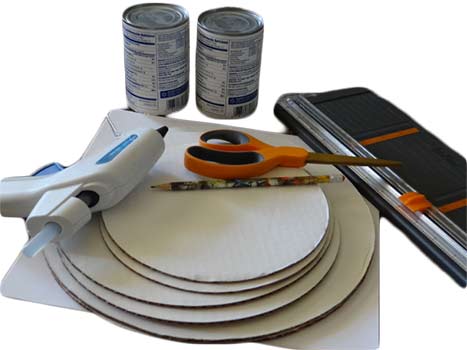
You will need:
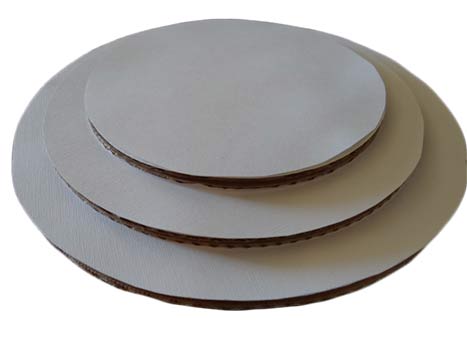
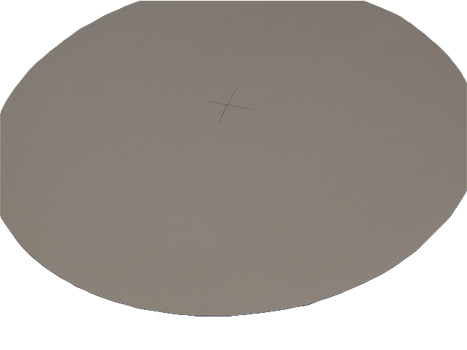
- 6 cardboard cake circles: 2 of each size. I used (2) 12", (2) 10" and (2) 8" circles.
- 2 cans of food from the pantry.
- 3 scrapbook papers in a matching color to your party at least the size of your largest circle.
- 3 scrapbooking papers to cover your cans and base
- A foam circle or square base for the bottom of the stand
- Hot Glue Gun
- Scissors
- A ruler
- A pencil
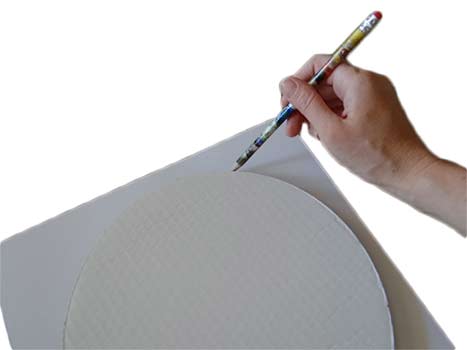
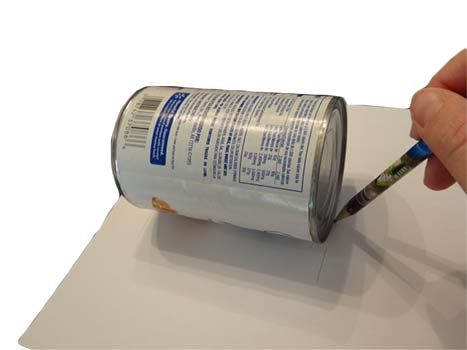
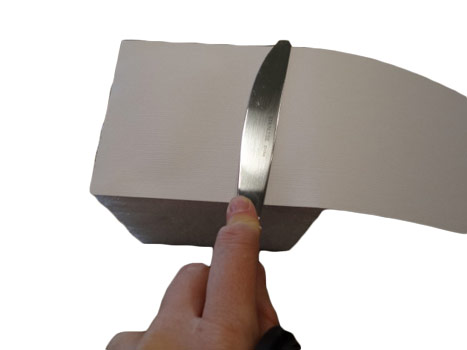
Start out by tracing the size of your cardboard circles onto your scrapbooking paper. You should have one top piece for each layer of your cupcake stand. Cut out your circles and set to the side.
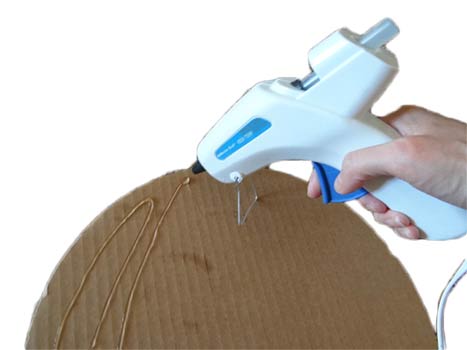
Using your hot glue gun; glue the cardboard circles together with their coordinating size, being careful to line up the edges as perfectly as possible.
Once the circles are glued together, glue the matching scrapbooking paper to the top of each layer. I used a basic cream linen textured paper on mine. But you can get creative with any type of patterns like polka dots, stripes and colors to match your theme.
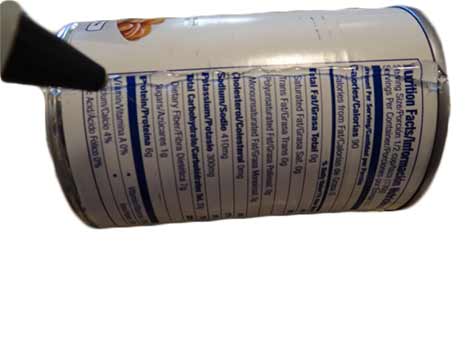
Now take your food can and measure it against your scrapbooking paper. You will be cutting the paper to the size of the can to completely cover it on the cupcake stand as it acts as your center support. Now, you do not HAVE to use a can for this. There are Styrofoam shapes or wooden shapes that could also work well. I just like the weight that a food can gives to the structure (and it is something I always have in my cupboards so it is easy to use).
Create a bead of hot glue with your glue gun on the can. I find this is the easiest way to start adding the paper.
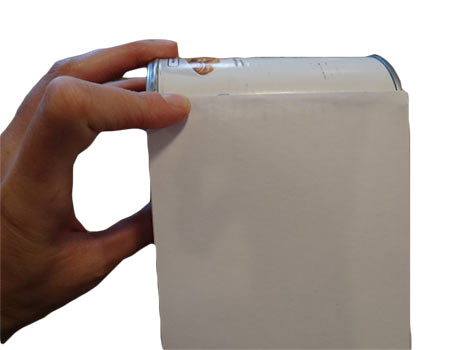
Attach the paper to your can, adding more hot glue to the can as needed. Watch the edge carefully as you straighten and smooth the paper out.
Measure and cut the scrapbooking paper to match your bottom Styrofoam base. I used a square base for this cupcake stand, but you can also use a circular base. Just make sure that it is big enough to support the size of your cupcake stand. I also used a knife to help smooth out the paper when the hot glue was a little too hot for me to touch.
Once you have all the supports and layers to your stand covered, you are ready to assemble everything.
I measured out the centers of the circles where the cans would go.

I also marked the bottoms of the cardboard circles to help me line everything up as I assembled it.
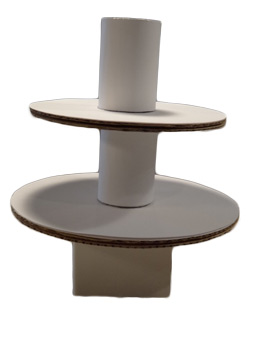
Once you have all the centers located, you are ready to hot glue all the layers. The bottom Styrofoam base was really easy, since the top and bottom surfaces were smooth. The food cans were a little trickier, since the only edges that make contact are on the outside rims of the can. Make sure you get the outside edge and the inside ring really well with the hot glue so you have good contact for the glue.
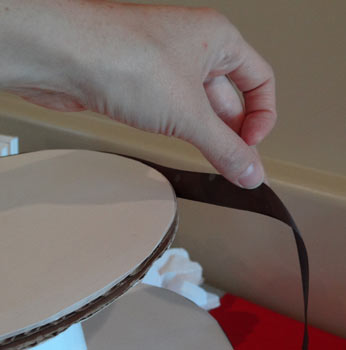
The last part of putting the cupcake stand together is covering the outside edges of the cardboard. I used brown satin ribbon to go with the sock monkey theme I was using. I also used a scrapbooking product called dots. They are double sided sticky circles. They work great and are easy to remove if you want to change the ribbon color out. You can also use hot glue to attach the ribbon.

There you have it! A simple and beautiful cupcake stand that is easy to make and fun to customize. Enjoy!

New! Comments
Have your say about what you just read! Leave me a comment in the box below.