


How to Make a Diaper Cake
In this article, you will find easy instructions on to create a diaper cake from start to finish.
You will also learn how to avoid the pitfalls that suck up time and money.
This section will give you in-depth instructions for creating your own cake.
Check out our step by step photo diaper cake instructions if you are a visual learner. ;)
~ How to make a diaper cake~
How To Make A Diaper Cake
Before You Start
Read entire article before starting so you have a clear understanding of what you are doing.
Decide on how many layers you want. Depending on the theme, you can make a cute diaper cake ranging from 1-4 layers. If you have more than one layer, you will need someone to help you put the layers together. It can be tricky trying to hold the diapers together and tie them together with only 2 hands.
Decide where the cake will be displayed. If you are a hostess, you might want to have the cake as the centerpiece to the food table or gift table. You can choose it to be in a separate table for guests to ooh and ahh over or put it next to the mother to be's chair.
What Will Be on Top? The next section will go into ideas of colors, themes, and items you can use to give your cake the perfect touch.
~ How to make a diaper cake ~
Choose Your Theme
You need to have a clear focus of what you want before you start assembling the cake. I like to have a few theme ideas in my head before I start the shopping process. You will be surprised at the ideas that will come to you while shopping. A lot of times the specific item I am looking for is not available, so I always make sure I start with a few ideas in mind so I have a theme to fall back on.
Here are some ideas of themes to use on your diaper cake.....
Color- almost any color is baby friendly. Most pastels are perfect for baby. Pink and blue are the main boy and girl colors. Green, purple and yellow are more neutral. An all-white cake can be both a delicate and beautiful choice for colors. You can stay safe by using neutral colors or all white if the baby's sex is not known yet.
If you are following a color scheme try to get your decoration items to match the scheme as much as possible. An example would be pink and white for girl or blue white and yellow for boy. Be creative and the ideas will flow to you.
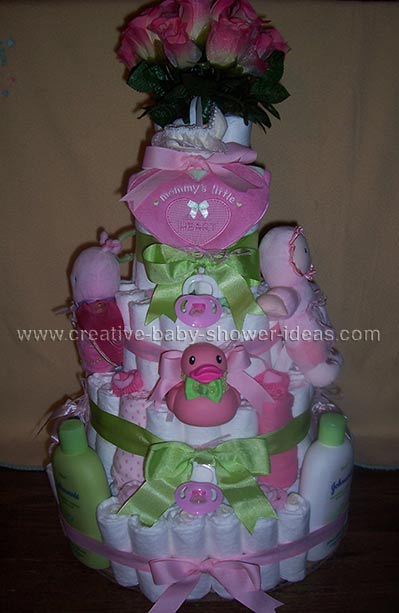
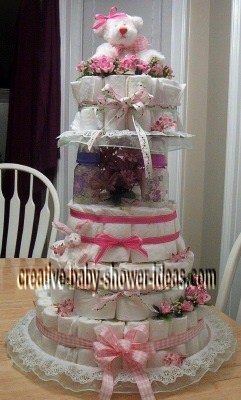
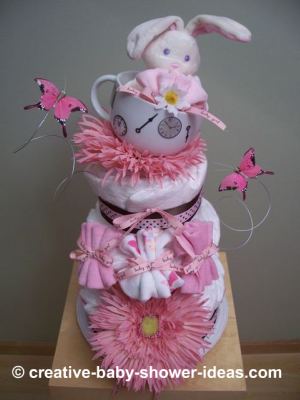
Centerpiece- The top is the centerpiece of the whole diaper. This is where you want the eye to be focused. There are all kinds of things you can choose to put at the top. You can use a large rubber ducky, flower, a rattle, a teddy bear or another stuffed animal, a baby doll, a ship or race car for a boy, a tiara, a bottle, a big bow, Barbie, or baby spoons. The possibilities are endless on what you can use. Once you choose the centerpiece, the rest of the diaper cake will easily fall into place.
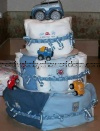
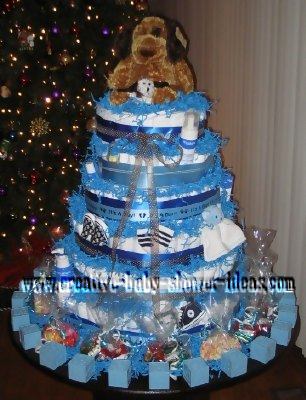
It is also fun to have an overall theme, Raggedy Ann or Andy, Winnie the Pooh, Rose petals and lace, Ships Ahoy, Candy land or Toy land, prince or princess. For example, this diaper cake has toy cars on it. The theme is based on a onesie I found that said," I love my toys." I chose blue and white as my colors and picked out some cute trucks that had a baby look to them. The blue ribbon around each layer gives it a nice finishing touch and the curling ribbon adds a soft baby feel to the cake.
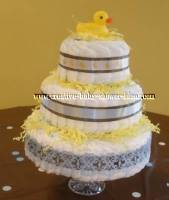
Shower theme- Perhaps your shower theme is on rubber duckies. A great starting point is to choose a rubber ducky for the top of the cake. Then you can use items with rubber ducky prints on it or yellow colors for around the cake.
Couple showers- When doing a couple shower you need to make sure that you stay in a manly range of colors. Most guys feel uncomfortable around really girly looking things. You might want to stay away from the pastels and ribbons and go for a sportier, manly look.
Gather Your Materials
Below is a list of items that are useful when making a diaper cake. You can decide which items are best for you to use on your cake.
You will need a package of size 1 or 2 diapers- one that has preferably 50 or more diapers in it. The amount of layers depends on what you want to accomplish with the finished product.
Clear rubber bands and or curling ribbon-used to secure the diapers once they are rolled up.
Ribbon- for the outside layer. You can use combination of curling ribbon or choose decorative ribbon or lace. Beads also add a nice touch to the cake.
Binding tool- double sticky tape, sewing needles, or glue dots
A sturdy core piece- I like to use a baby bottle. If you decide to not have a center core, you will want to have a base for each layer of the cake to keep it sturdy.
Base for the cake- described in more detail in the next section.
Now for the icing on the cake. I put together a list of items that you can use to create the final bling bling effect! As always, you as the designer have the final choice of what will go in it. socks, shampoo, lotion, blankets, onesies, bibs, spoons, sleepers, wipes, binky, clippers, bottles, rattles, washcloths, towels, etc.
How to make a Diaper Cake
The base- what to use
The base needs to be sturdy. It can be made of cardboard or metal or even glass. It must be strong enough to carry the weight of the cake.
You can buy pre made sizes from a superstore or cut cardboard to fit.
If you are cutting it yourself make sure that you do not use the boxes fold in the circle you cut. You can cut exact size of the finished layers or leave a little extra around it for decorating purposes. This is your cake; you have the final say of the design! If you want it to be decorative you can use double sided sticky tape or glue stick to secure a covering to it. The covering can be made of material or decorative paper. You can use lace, beads, tulle, roping, etc. to cover the edging. Be creative!
The bottom layer can either use a 12 inch or 10 inch base, depending on how much extra cardboard you want along the edge for decoration. The middle layer will fit a 10 inch base. The top layer can fit either a 6 or 8 inch base, depending on how much cardboard you want for decoration.
Start the Assembly!
The first thing you would need to do is have a way to secure the diapers once they are rolled up. Some people use ribbon, clear rubber bands (the kind you can use doing infants hair), or tape- be careful with this so the diapers are still usable. Roll the diapers and put ribbon or clear rubber bands to hold them in place. This will take the most time. The rest of the assembly will go quickly once they are all rolled up.
Roll the diapers in a manner to have the outside edge decoration in or decoration out. Rolling the decoration side in will give you a white cake. If for the effect, you want is to use the design of the diaper as a design of the cake, then roll it design out. This has a pretty cool effect when it is done.
~ How to make a diaper cake ~
Putting the Cake Together

The bottom of a three tier cake will need 2 layers of diapers around a center focal point.
In this example I used a bottle for the centerpiece. Tie a ribbon around each layer to make the next layer easier to construct. When you have the bottle and 2 surrounding layers together, tie it with ribbon to keep in one place.
Repeat this with the second and top layers. The top layer will only be 1 circle of diapers. You can also use newborn (or a size smaller to achieve another effect).
All 3 layers of the cake are finished. It is still pretty bare looking. The fun is just about to begin! Put on some tunes and break out your creativity! Before you begin though, one final question.
The Diaper, cover or not to cover? That is the question! Rolled diapers will give a scalloped look on the outside edge. If you want it to be covered you have a few choices. You can wrap diapers around the edge of the cake, the rolled diapers will be covered and it will give it a smoother outside appearance. Or use onesies, blankets, towels, and washcloths to cover the rolled diapers as you decorate around it.
How to make a Diaper Cake
Decorating- Using the ribbon and final materials to give the cake a finishing touch.
You are done with the layers, now is the time to add your creative flair. You can either individually tie or pin each item onto the cake or use ribbon to go around both the cake and decoration.
In the car cake example, I fit the onesies around the diapers and used the original ribbon to hold it in place. Before adding the final ribbon for a finishing touch, I tied curling ribbon all the way around the cake to give it more fullness and interest. Then I taped the ribbon over the curling ribbon with double sided sticky tape.
How to make a Diaper Cake
On a budget? Simplify, Simplify, Simplify. What can be cut without taking away from your design?
I have seen some beautiful diaper cakes that are just the diapers tied with decorative ribbon.
Perhaps you can accomplish the same look with 2 layers instead of 3.
You can use hat boxes found at a craft store. Cover them with tissue paper and you will only need 1 layer of diapers around it. That way you can buy a smaller package of diapers and ribbon. No need for bottles in the middle as a core.
The best way to save money is to make the diaper cake with a mutual friend and split the cost! You can get more supplies to the mother to be and reduce the amount you are spending in half!
Tips and Techniques
Curling ribbon can only be found on the internet and at a party store. Don't even waste the time looking at craft or superstores, unless it is Christmas and you are looking for red and green colors!
Cardboard bases are sold in packages of 8 or more. So if you are planning on doing more than one tier it can get costly.
If budget is an issue you have a few choices....
- Only use it on the bottom layer
- Use a cake stand or serving platter
- Or go to your local bakery and see if they will give or sell you the circles individually
For extra design flair, you can make roses out of socks and bunnies or lollipops out of washcloths!
Colored Diapers- Certain diaper manufacturers are now adding color to the body of the diaper, not just for the design on top. If you want white diapers, make sure that the side-view panels don't show a different color.
I have seen diapers in pastel green and lavender, but they might make them in other colors. Using colored diapers can affect the look of the cake; it can add a creative twist that is very pretty.
If you are giving it as a gift you can add to the suspense by wrapping it in Tulle, Lace or Colored Wrap, get fancy with Bows or balloons. Make it fun and exciting to open.
You are now armed with everything you need to know how to make a diaper cake that is both useful and beautiful. To see some great examples of how other people did it, go back to easy diaper cakes.
When you are finished with your cake, remember to come back and share your finished product with us. Sharing is the best part of making something beautiful!

New! Comments
Have your say about what you just read! Leave me a comment in the box below.