


How to Make a Rosette Backdrop for a Baby Shower
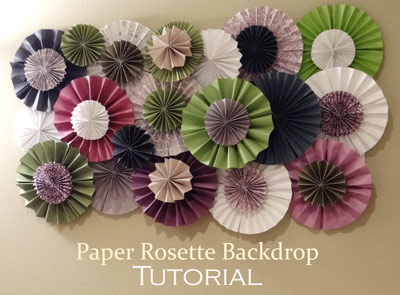

Create a simple and stunning background for your food table with paper rosettes. When put together and mounted on a cardboard or picture frame; it creates a beautiful focal point for the party room. I created these beauties using a scrapbooking paper pack that was in the main colors of the party of green and purple. I love how it turned out!
The lighting at the party was not the best, but hopefully you can see how pretty it turned out. It is a fairly simple project, but it is a little time consuming. So give yourself plenty of time to make them, or gather together a few friends for a fun girls' night to make a rosette display that will wow your guests. ;)
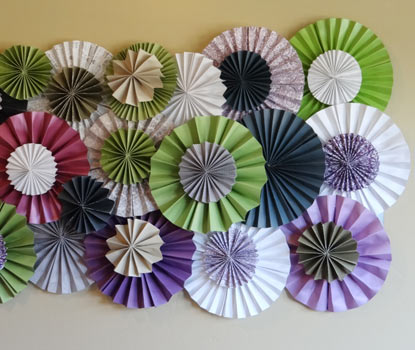
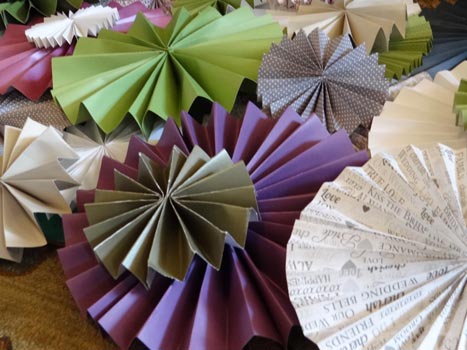
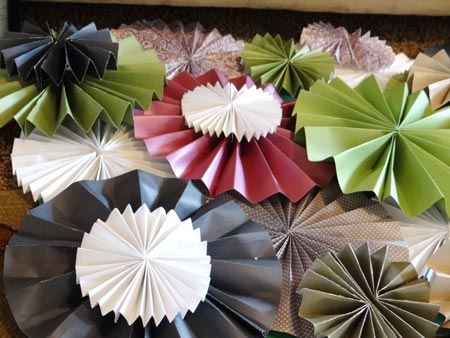
Here are some close up shots of the paper rosettes.

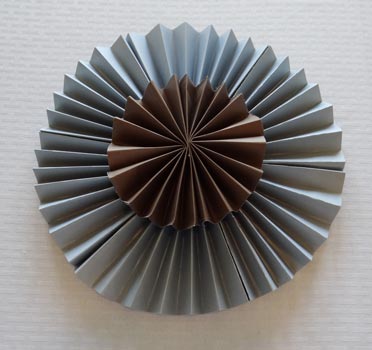
As you can see, you can layer rosettes of different sizes and textures to get the final effect.
Make a Large Paper Rosette
Let's start with the basics of creating a rosette. I am using 12x12 scrapbooking papers in the pictures below.
You will need:
- 3 pages of scrapbooking paper
- Scissors
- Staple gun or glue gun
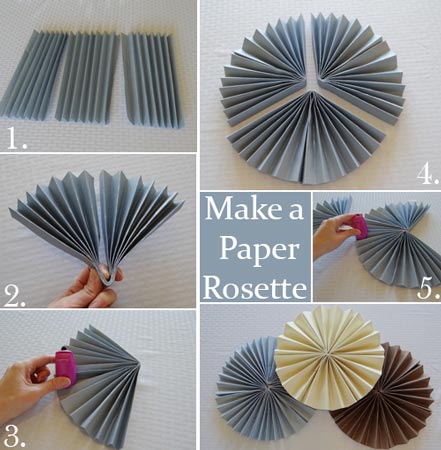

- Fold each of your 3 scrapbooking pages in an accordion fold. Pay attention to the direction you fold the papers so that the patterns on the papers match.
- Take a paper that has been folded and fold it in half. Repeat with the other 2 papers.
- Staple or hot glue gun the inside of the fold. Repeat with the other 2 pages.
- Line up your paper rosette so the staples/glue gun areas are all facing up.
- Staple/glue gun the inside edges of the rosette to connect it all together.
Make a Small Paper Rosette
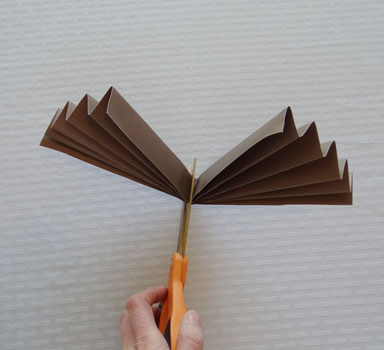
Now we are going to create the smaller sized rosettes that can be used to layer on top of the larger ones. Start by taking 1 sheet of 12x12 scrapbooking paper. Fold in an accordion style like the first step above. Then fold the paper in half.
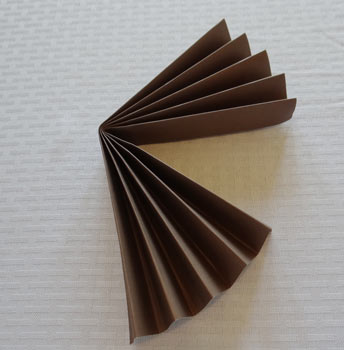
Cut along the fold, creating 2 pieces of folded paper.
Now fold each of those pieces in half.
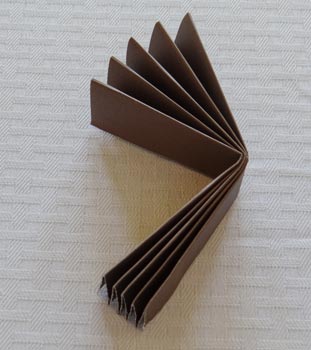
Staple the inside edges together. Repeat with the other piece of paper.

Turn stapled side of both papers facing up. Staple the inside edges together to make a rosette.
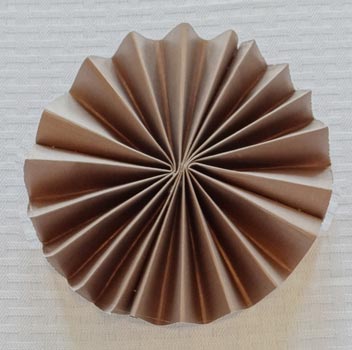
Layer the sizes and colors to get your final look.
Some helpful tips I learned along the way:
- I have seen online where people suggest using double sided sticky tape to hold the rosette edges together. I did a test run to see if it was strong enough and it wasn't. So I recommend using either a stapler or hot glue gun to attach the edges when you make a rosette.
- I used a mini stapler on mine because my larger stapler was too big to fit inside the rosette, since the actual staples are set back a little.
- Glitter cardstock does not accordion fold. It is pretty but the paper rips instead of folding. ;)
- To save on paper, I made some large rosettes using 2 pieces of paper instead of 3. It worked just fine so if you need to stretch the remaining amount of paper you have or if you only have 2 of one style, you can do this too.
Assembling Your Paper Rosette Backdrop
Ready to make the backdrop? Great! You will need:
- All of your paper rosettes
- A foam poster board (the hard ones) or cardboard to use as the base
- White cardstock
- A glue gun
- Any embellishments you would like such as doilies and buttons (optional)
I started with a cardboard base for my backdrop, but you can use anything that is in the size and shape you want to use. The one I ended up using was one of those fold-out cardboards for projects that they sell at Walmart and craft stores. I wanted something that was light to transport and it happened to be the right size. If it is not white, spray paint it before you begin so there is no obvious color peeking out from underneath.
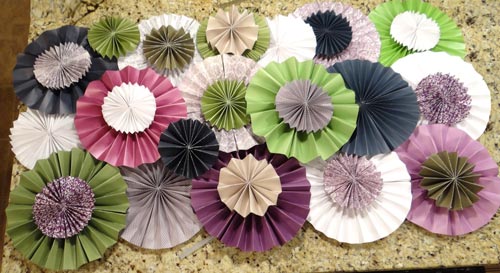
Here is the pile of rosettes I started out with. I decided to add some white rosettes to brighten up the colors using some normal sized 8.5 x 11 copier paper. I made both large and small rosettes from that.
Start dry fitting the rosettes to create the pattern of colors you would like to use.

Here is the finished pattern I made before I starting hot gluing everything together. I placed everything where I wanted it on the cardboard base so I had the exact location where everything should be.
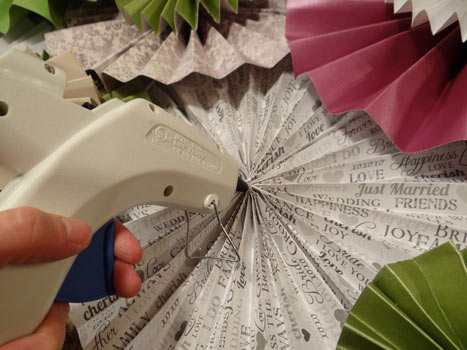
Start hot gluing everything in place. This is where the white cardstock comes in. Since the rosettes are folded up in accordion style, it doesn't give much edge for the hot glue to stick to. So I cut white cardstock in strips and then folded them up to give a solid base to use with the glue. Then I simply glued one side to the cardboard and the other side to the center of the rosette. It also gave the backdrop a nice 3d look. ;) I would work on each rosette one at a time so I would not mess up the pattern placement.
Viola! A simple and beautiful backdrop that is inexpensive and easy to make. I used velcro straps
to attach it to the wall. I love that these straps can hold the weight of the cardboard without doing any damage to the wall. It's great to use (especially if it is not at your house and you do not want any damage from hanging it.). I think we used about 8 velcro straps to mount it to the wall.
Amazon also carries a good selection of scrapbooking paper pads that might work for your project.


New! Comments
Have your say about what you just read! Leave me a comment in the box below.