


How to Make Tissue Paper Flowers
Have you ever seen tissue paper flowers at a baby shower or party?
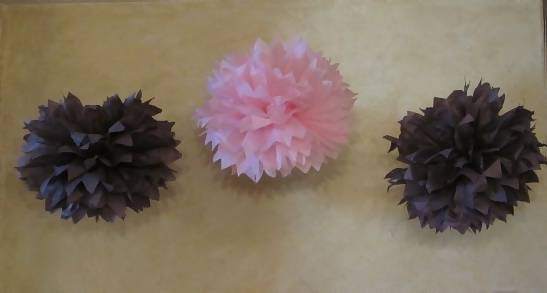
If you have, they are beautiful, whimsical ways to decorate. I love how they just seem to float in the air!
Truly mesmerizing and really inexpensive. ;)
Once you try them, you will be hooked. People use them for parties, to decorate kids rooms or their home, store fronts. You name it.
The best part about them is that these cheap pom poms are so incredibly EASY to make.
I have put together a simple how to tutorial to get you started.
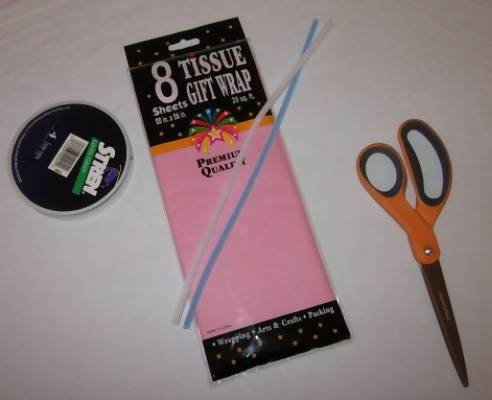
To make these tissue pom poms, You will need:
- 8-10 sheets of 20x30 or 20x26 tissue paper
- fishing line
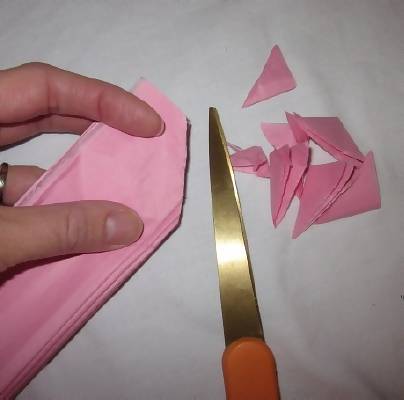
- sharp scissors
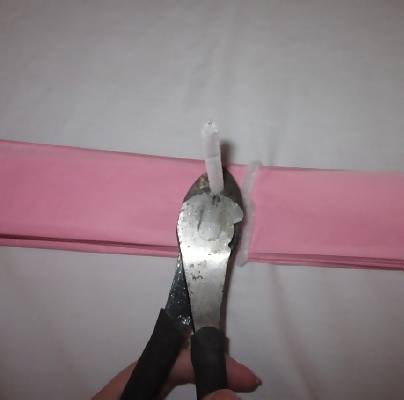
- wire cutters
- craft wire or pipe cleaner
- mounting hook
How to Make Tissue Paper Pom Poms
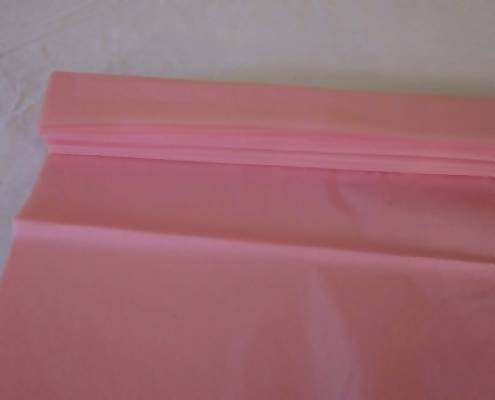
Lay out tissue paper in front of you. Line it up as best as you can. Do not worry about any folds it has from the packaging.
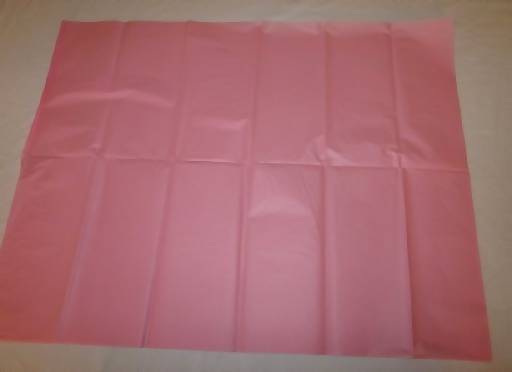
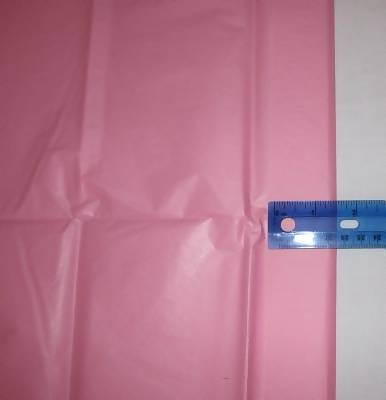
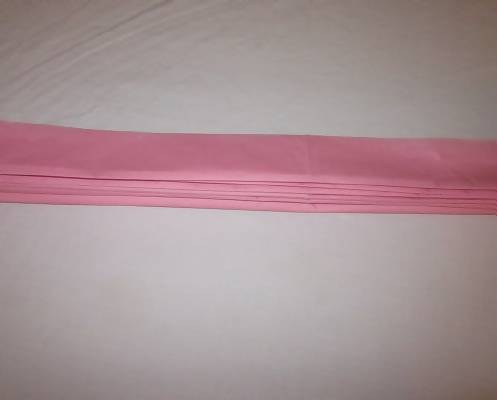
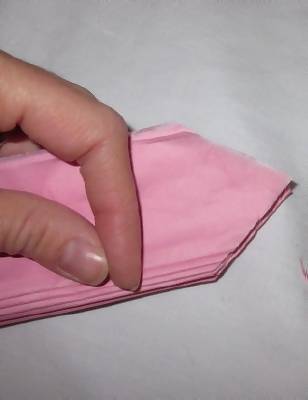
Fold tissue paper lengthwise 1 1/2 inches. Turn over and fold again, accordion style. Continue to fold until you reach the end of the paper, taking care to keep lines somewhat even. If you get a little off, don't worry too much, it will be hard to tell.
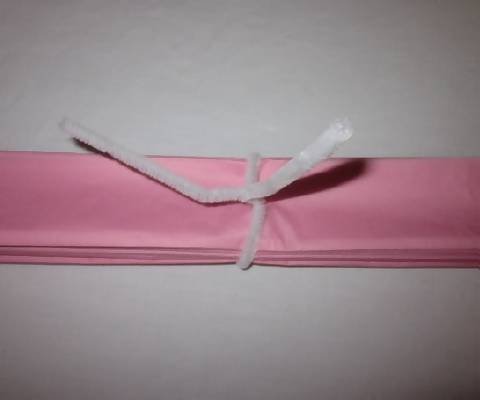
Tie your pipe cleaner or wire around the center of the tissue paper.
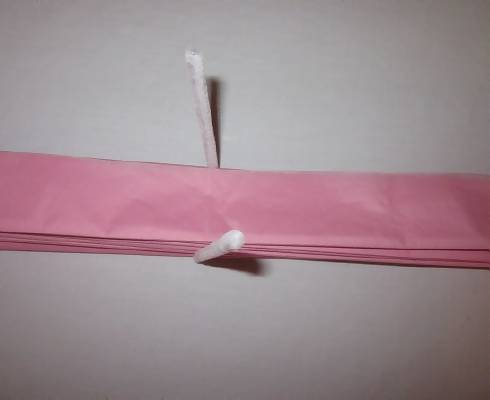
Cut a point or rounded edge to both ends.
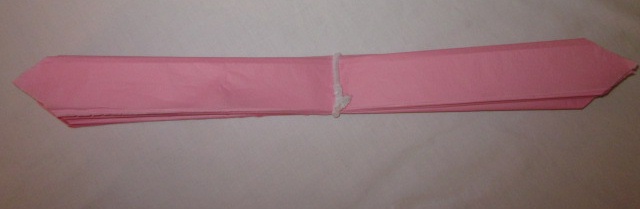
Tie your fishing line to the wire or pipe cleaner. To make sure the flowers hang evenly, you can make a loop out of wire for the fishing line to thread through.
How to Make Paper Flowers
This is where it gets fun. Are you ready? Take one end of the tissue paper and pull it outwards. Tissue paper can be a little delicate, so be careful as you pull it so it doesn't rip. Pull it out as far as it will go.
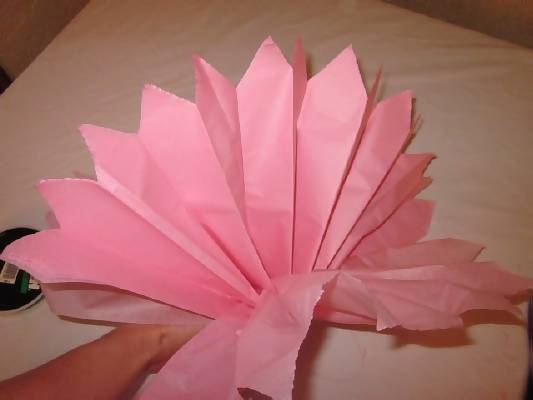
Then take the end of the opposite side and do the same. This helps it fluff uniformly. Continue to go back and forth and separate one piece of tissue at a time until the whole section has been separated. Yay! You are half way there!!
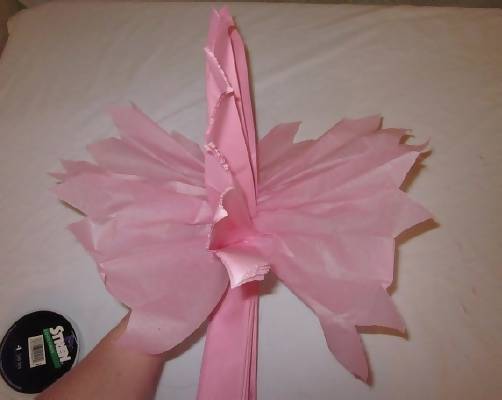
Repeat steps on the opposite side, going back and forth until the tissue pom pom is completely fluffed out.
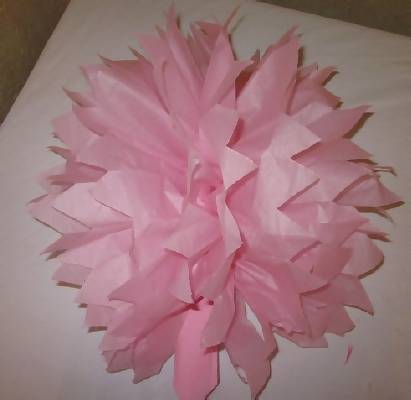
Tada! Beautiful isn't it?! Once you get the hang of it, you can cut the tissue paper in half or fourths to get different sizes.
Mounting Your Tissue Paper Flower
I use the 3mm scotch mounting hooks to hang my flowers on the ceiling. I like it because it is clear and white, so virtually unnoticeable to the people below. ;)
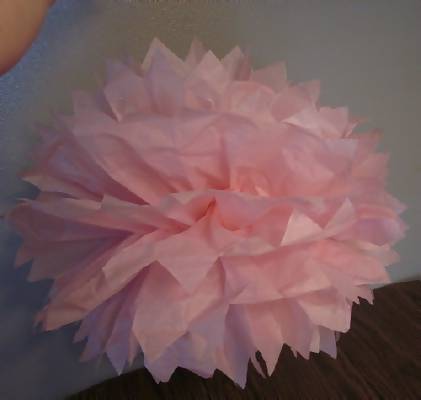
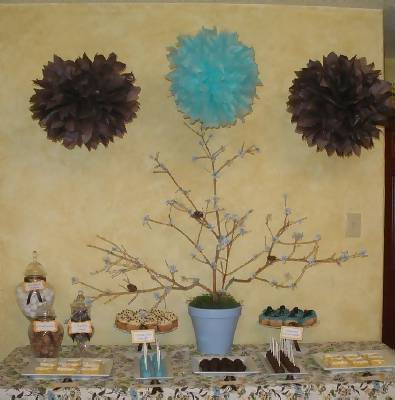
Tips: The 20x30 is the best size to use because it is long enough to create no gaps. It can be a little hard to find if you are in a hurry. Most craft supply stores carry the 20x26 size. These work great on short notice, but there will be a little gap on it since it is shorter. (My pink flower is made from a 20x26 and the brown ones are 20x30.)
So make sure to order your tissue paper early enough to get it in plenty of time for your party. You can pick up the 20x30 size at amazon
and eBay
.
You can also buy pom poms in almost any color that are already made to help save on time.
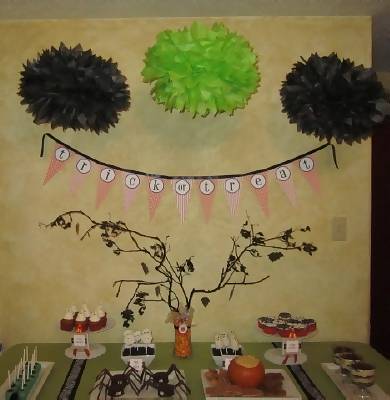
More Pictures of Flowers


Tissue Pom Poms You Can Buy
Share Photos of Your Tissue Paper Flowers
More Baby Shower Decorations : Return to Baby Shower Ideas Home


New! Comments
Have your say about what you just read! Leave me a comment in the box below.