


Cute Baby Shower Wreath Ideas- Burlap Wreath

A beautiful baby shower wreath is the perfect way to set the tone with your party guests. The best part of making a wreath for a baby shower is that you can use it as a decoration and then give it to the mom to be to use it for when the baby arrives! I put together instructions to help you make a scrappy style and a shabby chic styled wreath for your baby shower.
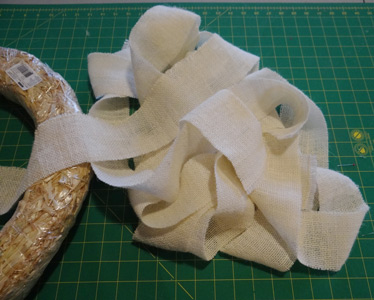
Make a Burlap Baby Shower Wreath
You will need:
- 1 straw wreath form- with the plastic covering still attached (size is a preference, but anything from 12-18 inches will work fine)
- Glue gun
- 1/4 to 1/2 yards of burlap depending on your wreath size
- Straight pins
- Scissors
- Coordinating material
Prepping The Burlap
If you haven't ever worked with burlap before, there are a few tips I have to help make life a little easier for you. ;) When you buy burlap, you will notice the chemical smell. It's pretty bad! The best way to get rid of it is to wash it. Some people don't and say the smell eventually fades, but when I bought my burlap, I had a headache from the smell just from holding the material in line waiting to get it cut! You can decide what is best for you, but I will go over the steps of washing burlap just in case you want to try it. ;)
You will want to make a zig zag stitch with your sewing machine along the edges of your material before it goes into the washing machine. If you have a serger, you can also serge the edges. This will help keep the edges from shredding in the wash and making a big mess. Make sure to put it on the gentle cycle. The less movement the burlap gets the better. I wash it twice. The first time I use detergent and some vinegar. The second time I wash it with detergent and some baking soda. The goal is to get as much of the smell out as possible, while trying to save as much of the material as possible. It will shred some and create lint, but the difference in smell is night and day.
Once you have washed the burlap twice, take it outside and let it air dry. I shake it a couple times to remove as much lint as possible. Once it is air dried, run a lint roller over it and shake it a few more times to try to get as much lint off as you can. Then iron all of the wrinkles out. I love the look of washed burlap. The look is a lot softer.
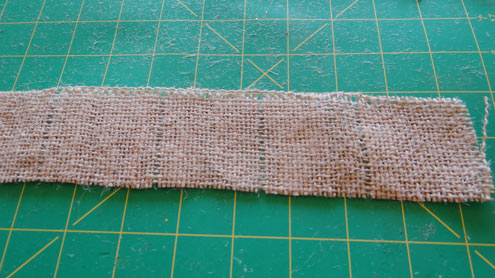
Cutting The Burlap Strips
Cutting burlap material is different from other material. It is made of natural fibers that are woven into rows. Each thread is considered straight, so using scissors and cutting will not give you an even look.
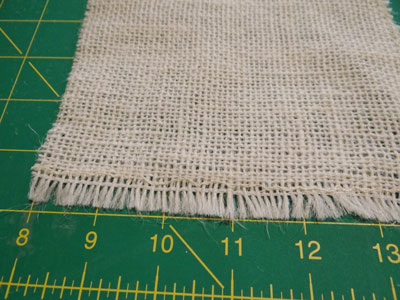

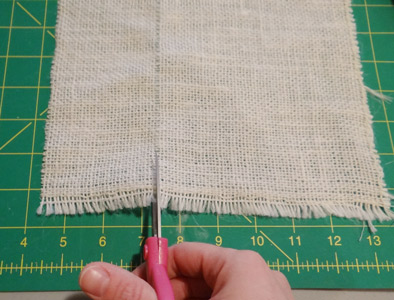
To cut your burlap... Line your burlap up on your cutting mat and decide how wide you want your strips. I used 3 inch strips of burlap to cover my wreath. Once it is lined up, pull the thread directly over the cut line away from the rest of the material.
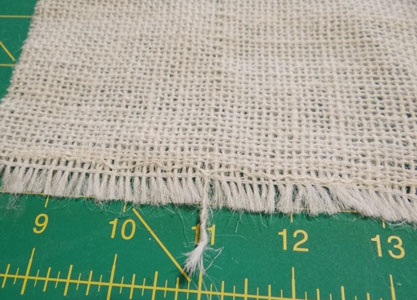

Continue to pull the thread until you have pulled the thread completely out of the burlap. This will leave a space where the thread once was and give you a straight cut line.
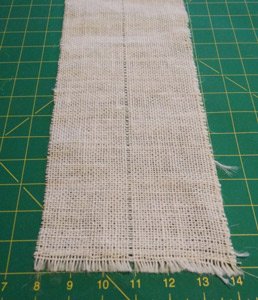

Using scissors, cut along the cut line you created. Continue to cut strips of burlap by pulling the thread out along the cut line until you have enough burlap to cover your baby shower wreath.

Tip: If your threads don't look straight to you, they are probably stretched out. They stretch the burlap to put it on the bolt. The threads are straight when they weave the material but burlap can stretch easily, pulling the threads out of place. If your threads are zig zagging all over the place, here is a simple tip to keep you from pulling your hair out. Spray water on your burlap to wet the fibers down. Using straight pins, pin the burlap to your carpet, using a ruler to make sure the edges of the material are all straight. Let it dry. It will help hold the fibers in place so you can cut and sew straight lines.
Assembling Your Burlap Baby Shower Wreath

I kept the plastic on my wreath to keep a clean form that was easy to glue the burlap to. To start the wreath, put a bead of hot glue on the back of your wreath and set the edge of your first strip in place.
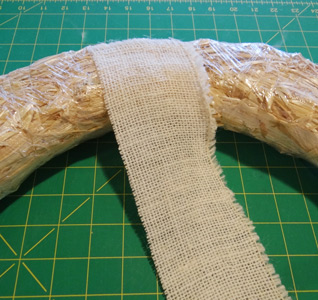
Then in a clockwise direction, wrap the burlap around the wreath, making sure the seams all face toward the back. To get a continuous look, start the next strip next to the end of the previous strip.
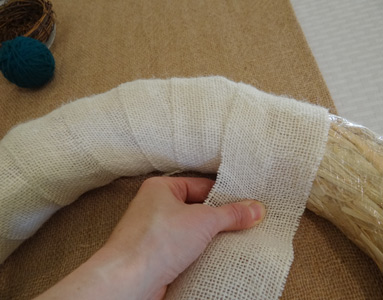

I used straight pins to hold the first couple strips in place so I could see how much overlap I wanted on my burlap. Once you have the burlap how you like it, remove the pins and hot glue the ends in place. Continue wrapping the wreath until it is completely wrapped.
Once you have the wreath covered with the burlap, you are ready to decorate it.
Burlap Baby Shower Wreath Designs
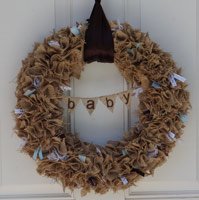
Scrappy Baby Shower Wreath Instructions:
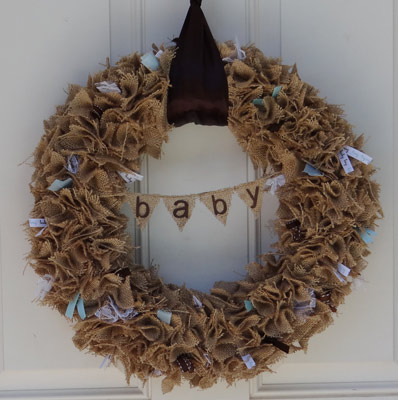
I made this rustic scrappy wreath for my sister in law's baby shower. I love the look it has! The best part is that everything on the wreath is pinned in place. Want to change the colors? No problem! Want to remove the banner and make another to go with the season? Great! Just unpin the ribbons or the banner and pin your new decorations in place.
You will need:
- straight pins (I chose the kind with the metal head that was slightly larger the pin so there was a lip to hold the burlap down with.)
- burlap
- ribbon
- hemp rope or twine
- scrapbooking paper for the letters
- thimble
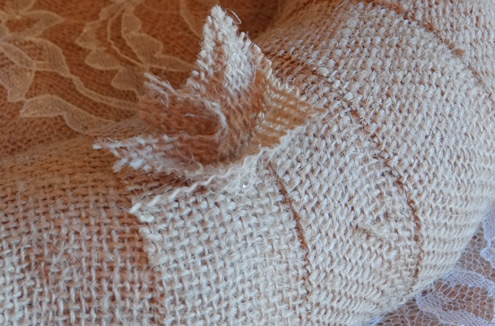
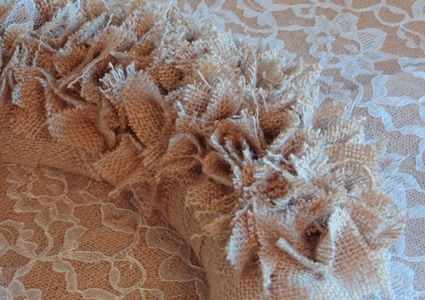
To create the scrappy look you will need squares of burlap to cover the front of the wreath...lots and lots of them. ;)

I made my squares 2 inches, but you can make them a little bigger or smaller to go with your wreath size and preference. To give you an idea, my straw wreath was 14 inches.
To attach it to the wreath, grab the center of your burlap square and twist it so it becomes a wrapped up point.
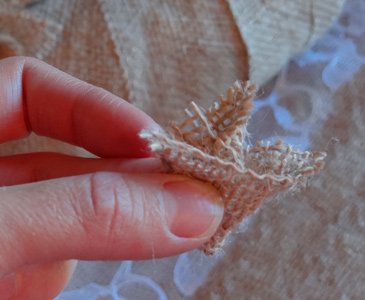
Stick the pin through the point and push the pin into the wreath.
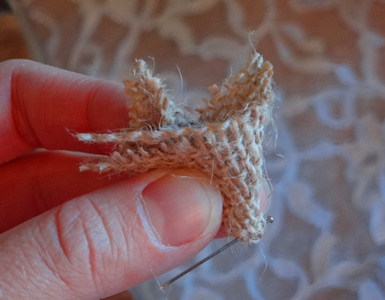
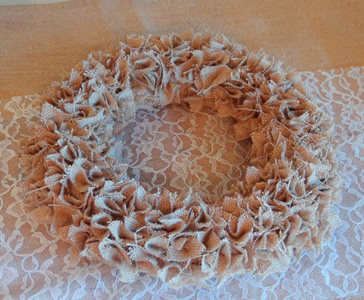
Repeat with more burlap squares until your wreath is filled in.
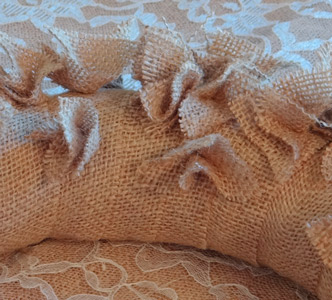

I wanted to conserve as much as my burlap as possible, so would work in sections. I would make a couple stacks of squares and pin them to the wreath before cutting out the next batch of squares.

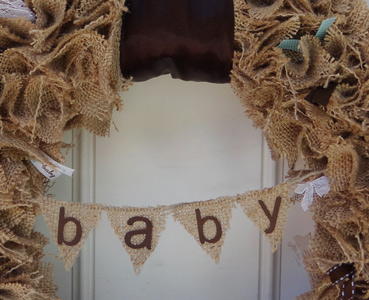
Once you have the wreath filled in, start adding ribbon in the colors of your baby shower. I did a variety of browns, blues and teals. Just snip them 2-3 inches long and pin the cent of the ribbon into the wreath for pops of color. I also added a little bit of lace to give a little more of a rustic glam look.
For the banner, I cut 2x2 inch triangles out of the burlap. I used my cricut machine to cut 1 inch letters out of chocolate brown scrapbooking paper that spelled out baby. Then I glued the triangles onto hemp rope and pinned the banner onto the wreath. The ends of the rope blended in really well with the burlap and since it is all pinned in, my sister in law can change out the banner anytime she would like. :)
* You definitely want to use a thimble to protect your fingers as you push the pins in. I didn't have one and my fingers were really red and swollen by the time I got done making the wreath. Ouch they hurt! Take my advice and save your fingers ;) !!
Get the instructions on how to prep and cover your wreath at the top of the page.
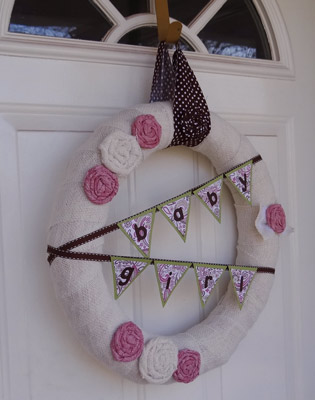
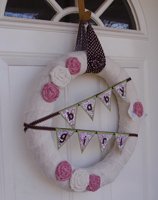
Shabby Chic Baby Shower Wreath Instructions:

I made this pretty burlap wreath to go with an owl baby shower I was helping with. I love the look of the lace with the burlap.
You will need:
Fabric
burlap
scrapbooking paper
ribbon
Making Your Fabric Roses
To decorate the wreath, I chose fabric that matched the party colors.
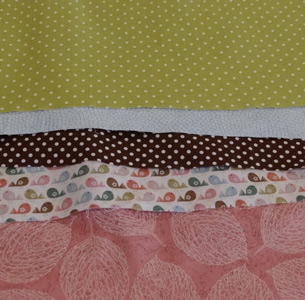
I created roses using the burlap, pink and polka dot fabrics to decorate the front of the wreath. I cut 2 inch wide strips of fabric. The length you use will determine the size of the rose. You can cut it when the rose gets big enough or add more material as you go to make a bigger rose.
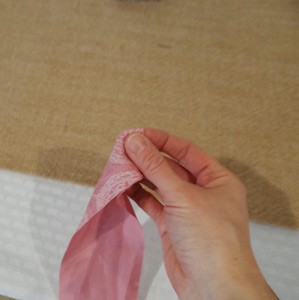
Start by folding the tip of your fabric in half.
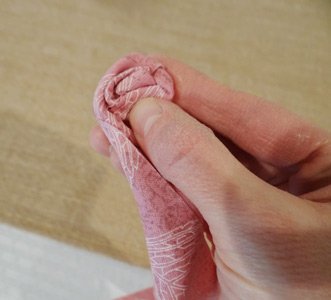

As you hold onto that end, wrap the fabric around it, twisting lightly.
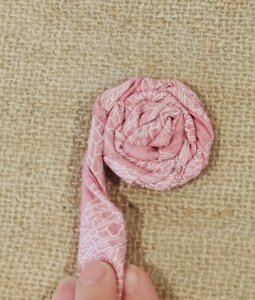

Continue to twist and wrap the fabric around the center point until the rose is the size you want. Add a dab of hot glue to the back of the rose ever so often to hold the rose in place.
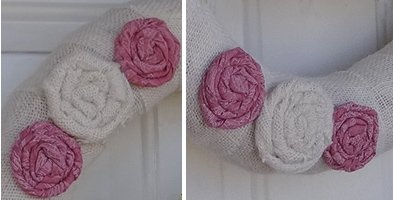

Here is a close up of the fabric roses I placed on the wreath. I used glue dots to hold everything in place until I knew where I wanted everything. Then I hot glued it.
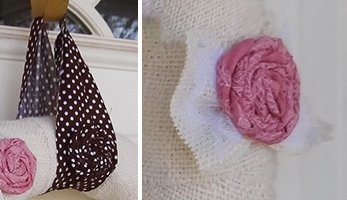

I also made a fabric hanger with the polka dot material and placed a polka dot rose in the middle. On the side of the wreath, I layered some burlap and lace under a fabric rose.
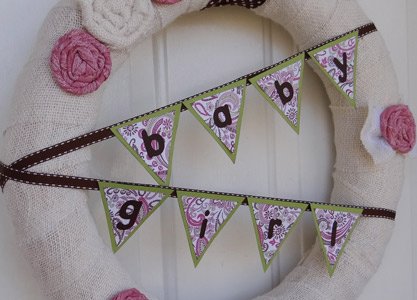

The pennant banner was made with scrapbooking paper. I made 3 inch triangles with the green paper and then layered it with 2.5 inch triangles on paisley paper. I used my cricut to cut out "baby girl" with chocolate brown scrapbooking paper.
It was hung on brown and white 3/8 inch ribbon that I crisscrossed across the front of the wreath.
Most of the time was spent on prepping the burlap. Once the burlap and fabric was cut in strips, the baby shower wreath came together fairly quickly. I hope you enjoyed the tutorial.
Good Luck With Your Baby Shower Craft!


Cute supplies and favors to go with your themes
Print these cute games from your computer for quick and fun time fillers.

Celebrity style invitations at inexpensive prices.
New! Comments
Have your say about what you just read! Leave me a comment in the box below.