


Diaper Cake Baby Shower Picture Gallery
Our diaper cake baby shower photo gallery has lots of fun and unique ideas for diaper cakes!
This section has the twin diaper cakes. If you would like to see more categories, click on the diaper index link below.
Twin Cake Index


Why should you buy a diaper cake on eBay?
- Great Prices! Most sellers are work at home moms with little overhead.
- You don't need to worry about being burned. The seller rating speaks for itself.
- Great selection! Get a professionally designed cake to match almost any theme.
Diaper cake baby shower pictures submitted to gallery by:
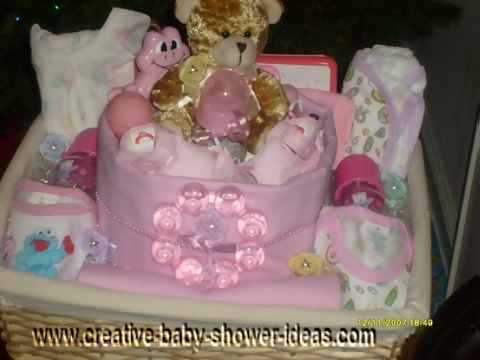
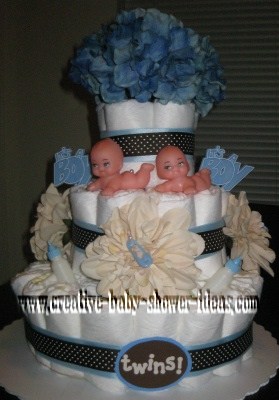
Jeraya D. from Englewood, New Jersey

I made this diaper cake for my husband's coworker who was having twins. It was made with 50 size 1 diapers, 1 receiving blanket and 9 various baby items.
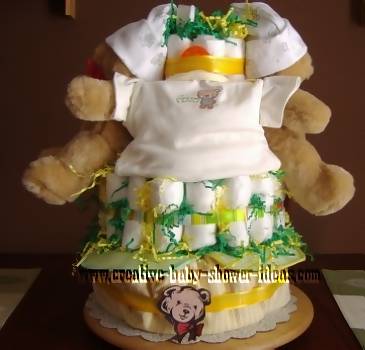
Diaper cake baby shower pictures submitted to gallery by:
Dawn D. from Cummings, Georgia
I started with a small paper towel tube then start wrapping around about 7 rows of diapers. Tie with ribbon then start the second row and make 5 rows of diapers, tie with ribbon. Then start the small row-about 3 rows. Tie off this row of diapers with a ribbon. Place a stuffed animal on top then some baby toys, teethers and pacifiers. Place a stuffed animal on tap and viola you have a diaper cake!!! This diaper cake was for a boy and girl.
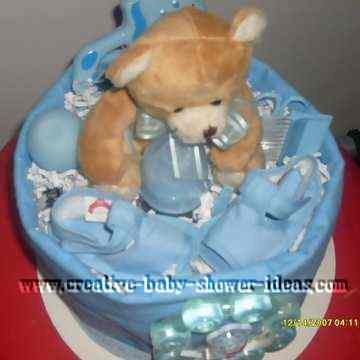
Diaper cake baby shower pictures submitted to gallery by:
Kelli A. from Arlington, Texas
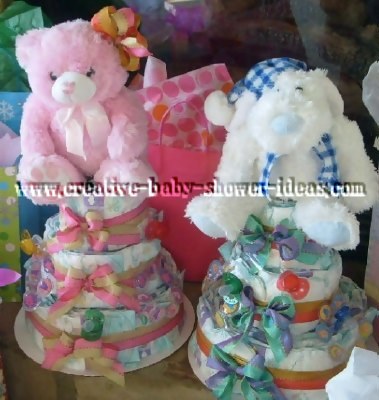
Diaper cake baby shower pictures submitted to gallery by:
Tammy H. from Kelowna British Columbia, Canada
Tammy created strips of posterboard that were 3 inches wide to create the circles for her 5 layers starting with the widest tier and going smaller from there. She loosely rolled her diapers and secured with elastics.She then filled her circles with rolled diapers, taking care that the seam is facing inwards. Once she tied ribbon around each layer slipped the mold off the diaper cake. All of the layers were placed on cardboard circles, which were threaded with candle coated string for structure.
Half of the cake was a frog theme (for boy) and the other a duck theme (for girl).
This is what she covered each layer with:
bottom layer- hooded towel
second layer- receiving blanket
top layer- receiving blanket
top- duck/frog stuffed animals
She used string to tie down the legs stuffed animals on top of the cake and then used double sided sticky tape to hold them in place.
She separated the front from the back of the cake by using matching It's a Girl/ It's a boy ribbon. She used push pins to attach the bibs to the cake and mini clothes pins to attach the booties to the receiving blankets. She placed rolled onesies, sock rattles, bath frogs, bobble heads and washcloth lollipops through out for decoration.
THINGS NEED FOR TWIN CAKE
(3) Receiving blanket(2) Hooded Towels
(2) Infant socks
(4) Wash Cloths
(2) Spoons
(2) Booties
(2) Onesies
120 ml Shampoo
(2) Bibs
Clip and wiggle friend
Teething Keys
Stuffed animals
Rubber Ducks
Rubber Frogs
Lg. Chocolate bar
(4) bobble head animals
Sock Rattles
Great ideas Tammy! Thanks for sharing them with us!
Diaper cake baby shower pictures submitted to gallery by:
Leanne R. from Port Talbot, United Kingdom
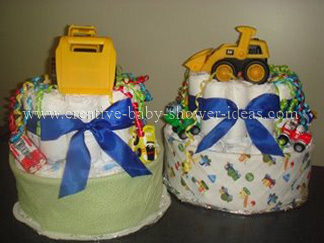
As usual I used a paper towel roll as the center support post and tied the rolled up diapers around it with curling ribbon. Once I had two rows I folded and wrapped a receiving blanket around the bottom tower and safety pinned the ends together. The dump trucks sat on top of the paper tower roll and were tied and decorated with more curling ribbon cascading down from under the trucks. These were for a friend having twin boys. They are super easy and fun to make, thanks for your ideas!
Diaper cake baby shower pictures submitted to gallery by:
Amy from the Guelph, Ontario Canada
Diaper cake baby shower pictures submitted to gallery by:
Lori B. from Moore, South Carolina
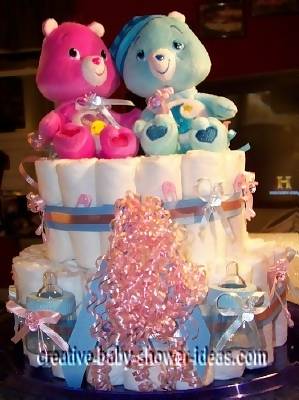
Here is a care bear twin diaper cake.
Diaper cake baby shower pictures submitted to gallery by:
Kinya L. from East Rutherford in the United States

2 Tier Strawberry, Raspberry Cake with Solid Milk Chocolate Lollipops in shape of Baby Rattle, Baby Carriage, and Baby Face. Thank you for viewing my 2 Tier Strawberry, Raspberry Cake.
Diaper cake baby shower pictures submitted to gallery by:
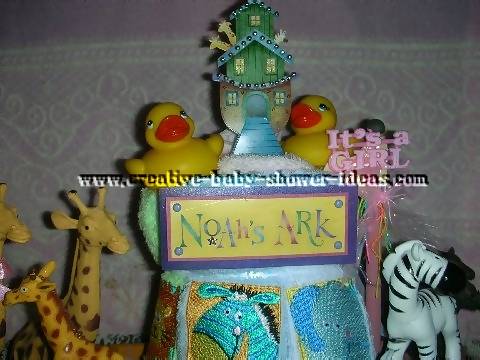
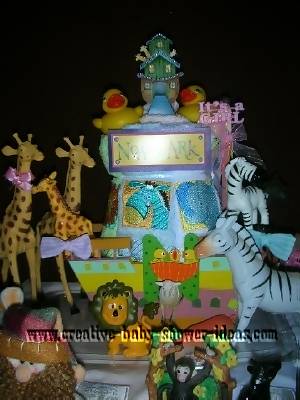
Artemisia S. from Culver City, California
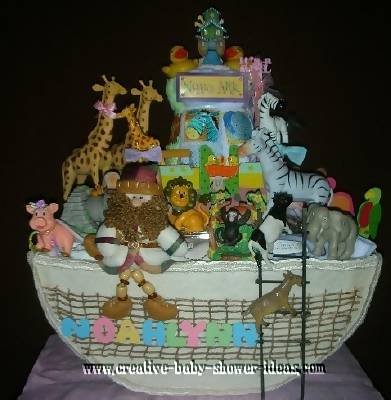
I made this diaper cake of Noah's Ark for a baby shower. Is only 56 diapers, baby's blanket, bottles, lotion, and baby powder. And different animals. Noah's Ark is made by hand.
Diaper cake baby shower pictures submitted to gallery by:
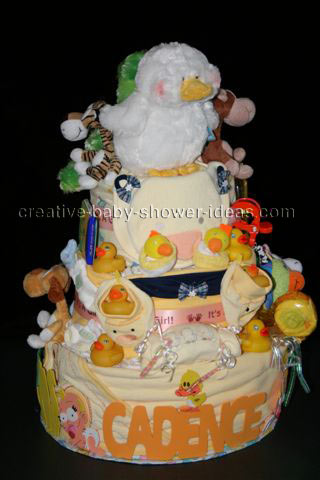
Randa Z. from Waco, Texas

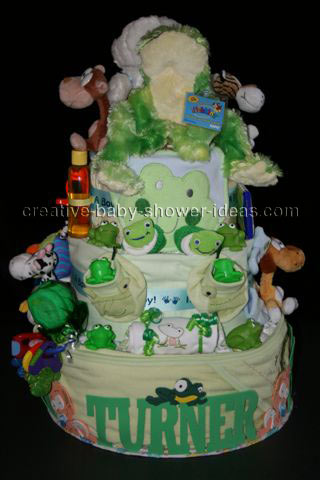
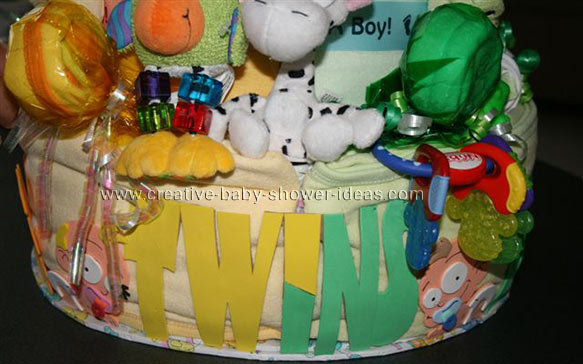
I made this Diaper cake for my Step-Daughter. It's the 1st one I've ever done. All the Baby goodies are inside the layers.She is having Twin Girls.
Diaper cake baby shower pictures submitted to gallery by:
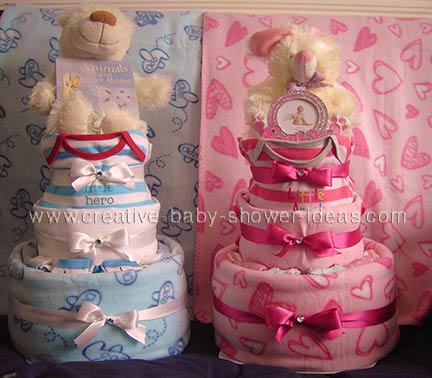
Marsha H. from Kansas City, MO

These cakes have a modern theme....with the traditional pink and blue on for a baby boy and baby girl...this diaper cake is three tiers and has a pack on onesies with a plush toy and lots of goodies hidden inside....
Diaper cake baby shower pictures submitted to gallery by:
Crystal E. from Iron Bridge, Ontario Canada

Diaper cake baby shower pictures submitted to gallery by:
Inga from the United States
Have You Made a Diaper Cake for a Baby Shower? Share Your Pictures!


New! Comments
Have your say about what you just read! Leave me a comment in the box below.